Friday, March 22, 2013

Throw Rug Tote's ~

Most of us have them or inherited them - either grown tired of them or they've started to wear out.  Now what to do with those old or new little throw rugs?  The older rugs still may have some usefulness so why not give this a go.

This is another idea I wish I could take credit for and I have NO idea where I saw this.  It's a cool one I'll say that - who doesn't need an extra tote for something - I apparently like tote I see to have made enough of them over the past several years.  :D

What you will need:
Throw rugs
Grommets & placement tools
Strong good quality thread
Needle(s) suitable for heavy fabrics
Webbing for straps or other

When making two you don't make the same mistakes with the second. LOL  The second tote was thought out better and went much faster.  Measurements etc. were quickly made since I did all the figuring with the first.  First bag I placed grommets last - I did not do that with the second tote.

Grab the throws you'd like to use.
Since it is fringed I didn't pin entire both sides,
so I could turn down for a decorative look.
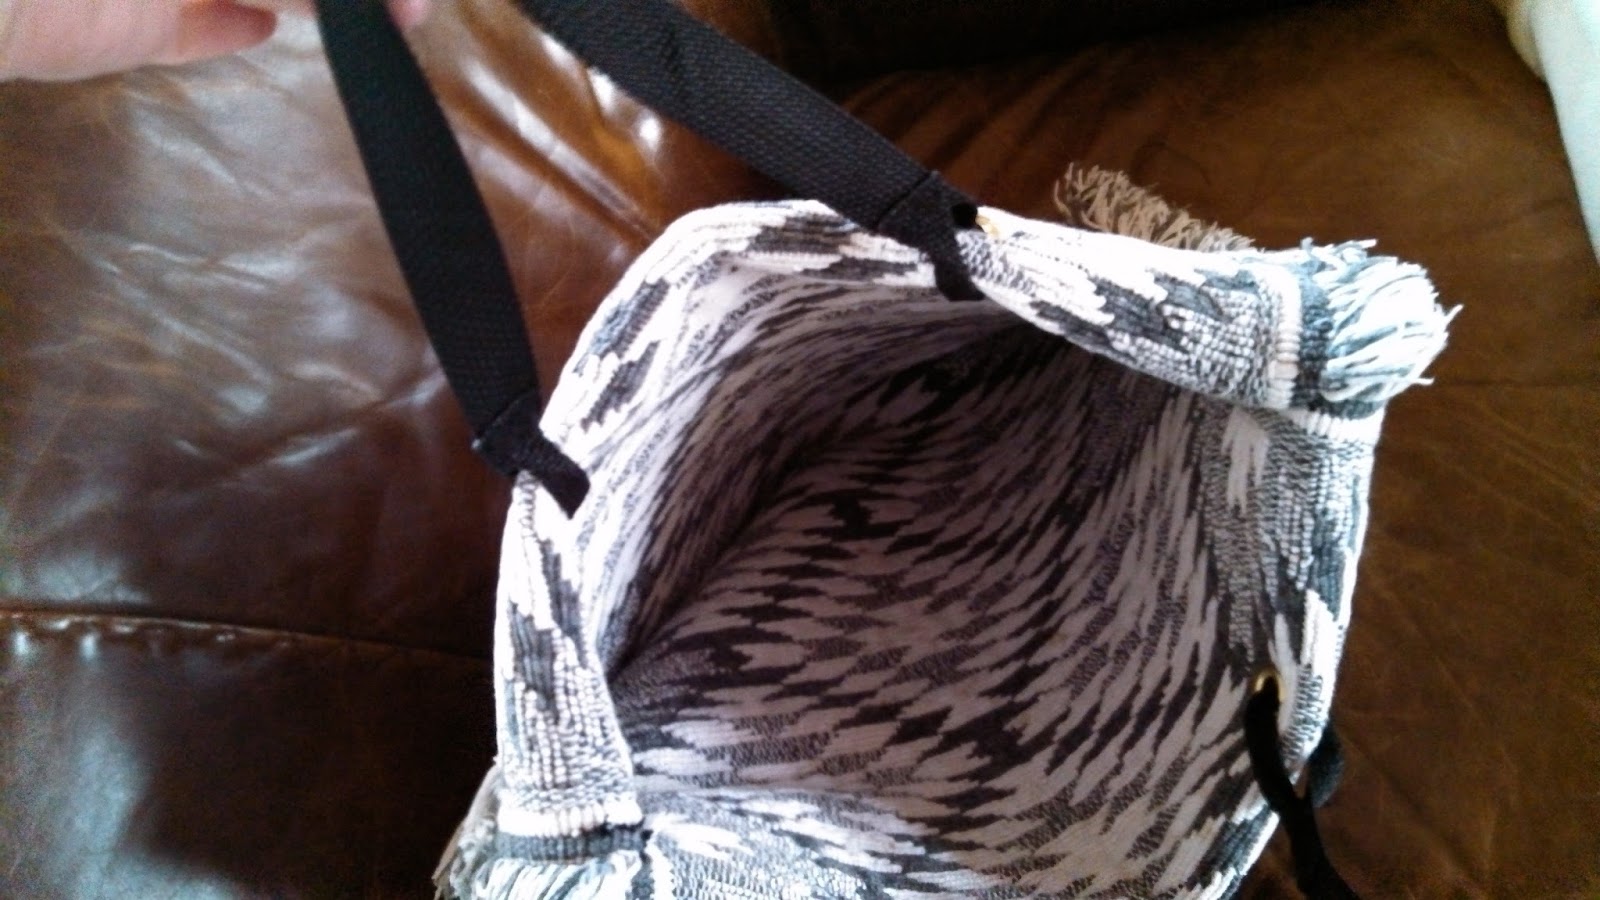
Figured out where I wanted the handles to be and placed grommets.
Since the throw was thick I had to use 4 grommets on each side.  See below.
Measured out 28" of webbing for 2 handles.  Then as in picture above
folded over & pinning sew as close to edge as you can.  This is for a
loop in grommets.  Do this at both ends then sew together making handle. 


That was the first tote.
Second tote I decided to place grommets first.  If you've never used them or if you have and forgotten - there is a front and back and a easier way than the first tote I did. :)  I had the right stuff lost directions finally decided to look on line here it was a good refresher.

I then knew what this was for! LOL hole placement~
Before you put top and bottom of grommet together,


make sure you know which is top and bottom. :) 
I needed to use as above for added thickness with fold.


Some thoughts ~

When I first decided to do this - I folded it in half, pinned, threaded my machine but didn't use proper needed for the project, and it was a bit of a struggle.  Also I was originally going to just sew the handles on.  I think - :)  Anyway, I headed into town and "search" for a size 14 - 16 machine needles to finish the job.  Next day got up and started on the grommets! LOL Afterwards I thought was I going to sew on the handles!  I do like the grommets better and on the second tote - I did them right.  (Photo's were taken with camera and cell - explaining coloration changes).

Again here's how to install grommets.

Tuesday, March 12, 2013

Pillowcase Tutorial

Though a small thing I feel good that I've accomplished this little project.  :)  I saw this in Ohio and even purchased the instructions - however it is with my my other misplaced patterns.  So Saturday while in town I went to The Jack of Arts where they were giving little demo's of this pillowcase.  I was pleased to get the refresher!  So I went ahead and purchased the fabric below with instructions.

It's simple but it helps to have the visual when doing.  For me anyway ~ I love how it goes together though and if I had come up with this it would have taken some thought and some more.  LOL

Once you have one done it takes nothing to throw more together once you have your fabrics chosen, measured and cut out.  As my Gram would have said, LICKETY- SPLIT!

For each pillowcase you will need:

3/4 (27") yard of your main fabric
12" by width of the fabric (selvage to selvage) for the cuff
optional accent strip (trim) 1.5" by with of fabric

I measured the width of fabric to be 43"

Pick out fabric.
Cut off this.
With right sides up lay together as so. If using trim fold  & press in half  wrong sides together.
Cuff 1st, main piece, then trim if used - pin.
Once pinned roll main piece toward pinned seam.
Re-pn. I will resemble a tube.
Sew pinned seam together using 1/2" seam.
Pull fabric right side out press trim down and cuff flat.
Fold with right sides together press and pin cut seams.


Stitch as close as you can to the edge. Yes on right side, side and bottom.
Turn inside out (right sides together) press where you just sewn to flatten.
Sew a 3/8" seam over the "L" shape (side & bottom) you just sewn.
Turn right side out - you now have a clean seam - seamless.
Very nice pillow to enjoy are give away!
If you have any questions ask away I'll do my best to answer.  It truly is a quick case to put together; in fact post took more time.  :)

I have to say that our little town seems to be getting active once more.  It a wonderful thing.  With the efforts of A Step Back In Time - cool little coffee shop reminiscent of those I've visited and lived near in other places - doing what they cant to generate business.  It's sad when a town starts dying without the support of the community.  I've/we've always choose to support local business first.  Personally I can't stand Walmart and choose to stay out as much as possible.  In fact unless I can find it elsewhere I just don't need it.  :)  However, sometimes I'm forced without a choice.  :(

So kudos' for all who are working hard to keep our town active and alive.  I'm continuing to add some favorite places around town to do above are two.  Below a few more:

Cottage Bakery   also Olney B & B you can check on home page.  I LOVE going here!
Gingerbread Co.  (Facebook)
Debbie's - great for crafters.

There's a lot more than meets the eye and I'm hoping the community will really give shops there due and support them.