Showing posts with label Recycling. Show all posts

Friday, December 26, 2014

Bags ~

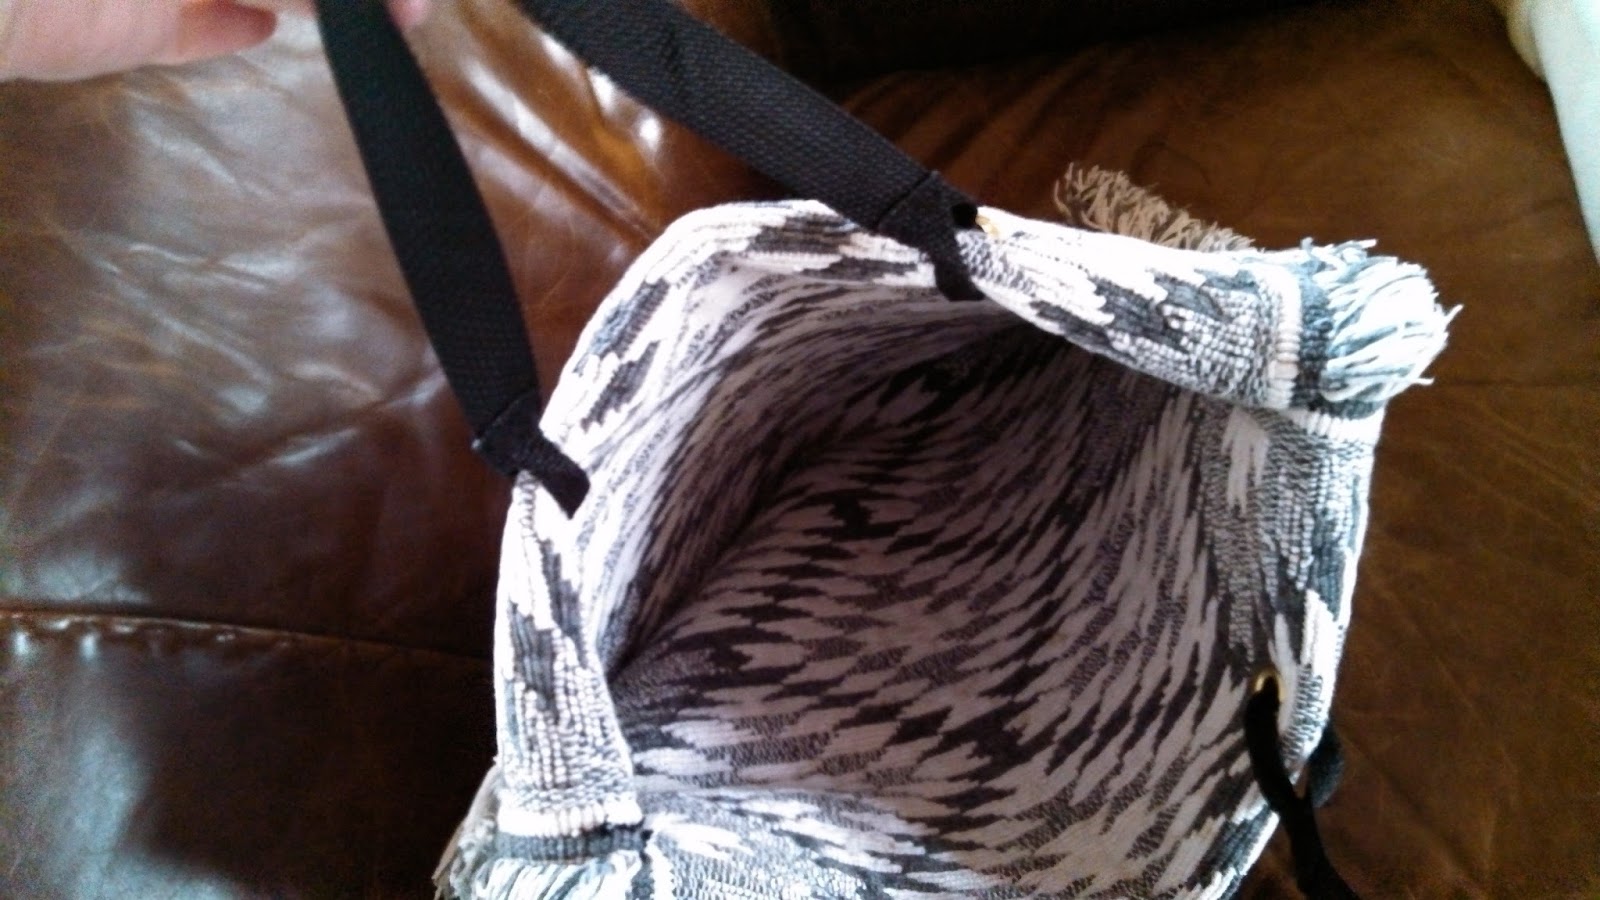
Ye Ole Loot Bag ~ (lined)

Nice size to carry a few groceries.

Straps made from super heavy nylon webbing.

upholstery fabric

Coloring is a bit off ~

Each project you decide on a size that will soot your particular needs.  The grocery bag was single heavier weight fabric cut 36" w x 19" L ,  I folded in half width - right sides together and stitched along the opening (L shape) 3/8 of an inch.  I then zig-zagged around raw edges or you could a serger if you have access.
I then brought the fold side together with sewn side (still right sides together) and you will have formed 2 triangles at the bottom either side.   Measure the point back 3" or 2" (this is to create the bottom and sew across.   This is also optional.  Do this on both sides and then I stitched corner triangle down (opt).  I think you can see the idea two pictures up.  
Once bottom is finished roll down and press at the top opening to form a 1" band.  I allowed for 2" folding once at 1" then again.  I stitched all the way around as close to the lower edge as possible.  Next I placed where I wanted the strapped and sewed down.  Middle picture of straps you can see I folded and sewn to fit the comfort of a hand.  (opt).

For the goodie I sewn top opening down and allowed to run a ribbon through to pull closed.  This was just a quick "look" at what I recently made, so if you have any questions on a how to let me know.

Thursday, December 18, 2014

Merry Christmas!

Yep a new entry.  .  .

I have been up and down in the decorating department since we moved back to the southwest, more like on and off depending on able-ness.  It's complicated.  Anyway, I was able to ship out a few things surprising early.  And, I mean surprisingly! Yep something just came over me a couple weeks ago in the creative department.  I wanted to do something special for dear friends - even I was impressed.  I actually sewed something, keep in mind Julie I haven't forgotten the quilt (I'm ashamed)!  It's been so long I believed you when you said, "It's been so long I forgot what the fabric even looks like."  (I'm ashamed)!  I need more than inspiration! It's complicated ~

Getting back to being impressed -


Merry Christmas to my girls, Joan, Monica and Rita!

It's called "the emmeline apron" that I purchased from the Jack of Arts here in town.  The Teapot fabric I purchased years ago from Calico Corners in Ohio; it is a discontinued fabric from Bloomcraft. I tried everything in search of it and it's no where that I can find.  So the aprons are truly one of a kind including a few little mistakes! lol  There is so much fabric in this apron :D - and you can have fun cooking it up with one side and dress up serving with the other.  I opted out on tying around the neckline since the strap at the waistline is so big.  Some have made the pattern with a narrower strap; I followed the directions with the full 3" width finish.  If I make this again I would probably use less  - "possibly."
The smaller apron was an idea I had for Rita, youngster, that she can grow into, it actually is my favorite.  For the boys I made pillowcases that they can hangout together and watch sports or movies ~


I wanted to do something special for my dear friends (family) that have been a blessing to me.  This year I guess was it, my husband said his present was to see me sew again.  Will see if the "phenomenon" continues.

In keeping with a reversible theme, and not to leave out  -

Our "Sweetman" Logan

I felt like he needed his own stocking.


      I had leftover material from other projects.

Jim suggested the bandana. 


With special touches. 


So a couple days ago I decided our girl Reilly needed her own stocking from me.


Stockings had become an important part of our family (immediate).  Our Christmas tradition we started when our boys were very young.  I don't know how I decided to do this but all of us enjoyed having the stockings.  We first would include them as part of our over all decorations.  Then after the boys went to bed Christmas Eve I would fill up the boys stockings with all kinds of fun things and goodies.  The stockings would usually be placed in their rooms on their beds just before they'd wake,  Then I'd go back and lay down to prepare myself for the day but mostly listen for happy sounds of excitement.  We got to rest awhile and the boys enjoyed their loot!  My husband said he thinks the boys enjoyed their stockings the most.

Part of the fabric used in Reilly's stocking came from Christmas curtains I made when the boys were younger in NM.  Also the corduroy I used for reversible side is also trim for Logan's.


I pray that everyone has a blessed Christmas.  Last year at this time was spent at the hospital with my husband recouping from an emergency neck surgery.  I didn't get anything done as far as Christmas goes.  It was a long hard time for us.  I'm so thankful that he came out of the surgery alive and not paralyzed.  Praise God!  Our journeys aren't over and the past year plus has been something for the books as my gram used to say.  But those stories will have to wait for more time to share.

Merry Christmas one and all with blessing for the New Year!  I serve an awesome God who loves us all.  It's why we celebrate Christmas - though maybe not the exact day but we celebrate the birth of Jesus - Gods gift to a sinful world.

For unto us a child is born, to us a son is given, and the government will be on his shoulders.  And he will be called, Wonderful Counselor, Mighty God, Everlasting Father, Prince of Peace.  Isaiah 9:6

Friday, March 22, 2013

Throw Rug Tote's ~

Most of us have them or inherited them - either grown tired of them or they've started to wear out.  Now what to do with those old or new little throw rugs?  The older rugs still may have some usefulness so why not give this a go.

This is another idea I wish I could take credit for and I have NO idea where I saw this.  It's a cool one I'll say that - who doesn't need an extra tote for something - I apparently like tote I see to have made enough of them over the past several years.  :D

What you will need:
Throw rugs
Grommets & placement tools
Strong good quality thread
Needle(s) suitable for heavy fabrics
Webbing for straps or other

When making two you don't make the same mistakes with the second. LOL  The second tote was thought out better and went much faster.  Measurements etc. were quickly made since I did all the figuring with the first.  First bag I placed grommets last - I did not do that with the second tote.

Grab the throws you'd like to use.
Since it is fringed I didn't pin entire both sides,
so I could turn down for a decorative look.
Figured out where I wanted the handles to be and placed grommets.
Since the throw was thick I had to use 4 grommets on each side.  See below.
Measured out 28" of webbing for 2 handles.  Then as in picture above
folded over & pinning sew as close to edge as you can.  This is for a
loop in grommets.  Do this at both ends then sew together making handle. 


That was the first tote.
Second tote I decided to place grommets first.  If you've never used them or if you have and forgotten - there is a front and back and a easier way than the first tote I did. :)  I had the right stuff lost directions finally decided to look on line here it was a good refresher.

I then knew what this was for! LOL hole placement~
Before you put top and bottom of grommet together,


make sure you know which is top and bottom. :) 
I needed to use as above for added thickness with fold.


Some thoughts ~

When I first decided to do this - I folded it in half, pinned, threaded my machine but didn't use proper needed for the project, and it was a bit of a struggle.  Also I was originally going to just sew the handles on.  I think - :)  Anyway, I headed into town and "search" for a size 14 - 16 machine needles to finish the job.  Next day got up and started on the grommets! LOL Afterwards I thought was I going to sew on the handles!  I do like the grommets better and on the second tote - I did them right.  (Photo's were taken with camera and cell - explaining coloration changes).

Again here's how to install grommets.

Saturday, February 23, 2013

Tea Bag Tutorial ~

Valentines Day was coming and I was planning on making Lavender sleep pillows.  It didn't happen - though I read somewhere about recycling sheer curtains that I planned on using for this project and then make a decorative case.  Well time went by and we were all in busy mode here - I didn't get a chance to make them.  I did get to try them for tea bags.  :)

A favorite brand.
Old wash sheer curtain.
I cut into a strip 1-1/2" wide then I folded it over as I went sewing to make a 1-1/2" square. Sewing only 3 sides and close to edge.  Then turn inside out to form a small bag.


Then I filled it with 1 heaping teaspoon of a favorite loose tea.


Pulled closed in opposite direction sewing close to the edge.


Package up.  Keep or give away.


Break time ~ Enjoy!


Also something I finished something close to my heart is a quilt for our grand-baby.

Saturday, June 2, 2012

It was time . . .

Yep, I started to think and thought it was time to dusted off my sewing machine and get busy!  I have many unfinished projects and some to start.  :)  Pictured is a recycled pair of shorts I took from my friend Joan that she wasn't using, made into a bag.  I'm still not real happy with the handles but I couldn't put it off any longer.  Over all happy with it.  Hope you like your bag Joanie!


What have you been putting off?  Sometimes, - NO - it is important to step aside from busy and do something you enjoy or used to!    :D

Had to add a couple pictures - I did start this in Ohio.  :(  But it's done now.  :D


Thursday, February 18, 2010

It Still May Be Winter, But Here Spring Is In The Air ~

Who would have thought a nest box for fresh eggs could look so artsy; my daughter n law!  I do think of doing creative things or at least used to often, but it doesn't often materialize as I'd like.  Dannielle has many favorite artists she enjoys but this is her rendition of the artist; Natasha Wescoat   and I think she's done a wonderful job.  I think Danielle plans on doing a few more things to her work and my Dad would like her to do the American flag on top - you know for that aerial view - LOL!  It will all look great and if for any reason we might get a "gray day" here all we need to do is look out the window and over to the chickens for a beautiful sun rise / or set.

Dannielle isn't the only one that's been busy here; Mat has been working on a garden and found a great spot with good dirt.  My Dad had already planted a couple Pistachio Trees there and it once had a couple fruit bearing trees that need replacing.
 
Here you can see Mat working on the fence to keep the critter's out, he has salvaged unused wire from other projects. 


Even though its winter the Pistachio trees will soon have leaves and I'm thinking benches to watch over the garden and look on to the beautiful mountain.


 And not to forget Sophie she'll enjoy the garden too!